
Edit page content
The 'Manage Content' button > Add a table
Occasionally you will want to align columns of text, or place a chart on your site. Adding a table is a perfect solution for this. Place your cursor where you want to add a table, and click the  'Table' icon in the toolbar. A table properties popup will appear.
Complete instructions about working with tables in the CKEditor can be found here: Creating Tables.
A simple thing you should remember about tables is, if you want the borders of the table to display, set the border to one or more. If you want the borders to be hidden, set the border to zero.
Adding or deleting rows or columns in a table
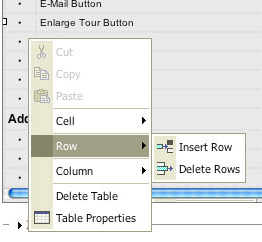 Place your cursor inside of the first cell in the row above the row you want to add (or inside the row you want to delete). In Windows, right click in that cell to get a pop-up menu as shown here. On a Mac, Control-click to get this menu.
It is recommended that you don't try to get too fancy with these options, and only really use them to add and delete rows. But if you venture out further, and find something doesn't look the way you anticipated, have no fear. Your page is never saved until you hit the 'Submit' button at the bottom. Leave the page and you will lose any changes you've made.