Lay out your site's navigation
 By now you should know the general layout of your site. If you have not yet determined this, then it is recommended that you sit down and create a layout on paper in an outline format like the example on the left below:
| The Sample Site Outline | Corresponding Content Types |
|
|
 Each line item in your site outline will need to be defined as an individual page, a navigational guide, a form, etc. This is done by clicking on 'Define New' in your site manager for each item, one at a time. You will determine the page's content type from within there.
 For the purpose of this tutorial we will be using this sample outline laid out above here. Before you begin working in the Content Management System on your own site, make sure you have already laid out your own similar site outline.
Tree Structure
 Let's look at our sample outline again. Notice this time that it is color coded. Some of the line items you see are pages (purple text) and some of them are strictly navigational menu directories (green text), a.k.a Menu Spacers.
- Home
-
About Us
- Staff
- Our History
- Company News
-
Products
- Hats
- Gloves
- Scarves
- Shoes
- Rain Gear
- Beach Wear
- Accessories
- Contact Us
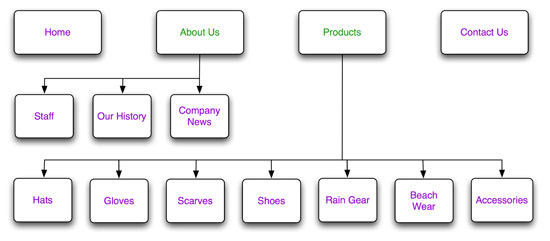
 This flow chart displays the entire sample site structure branching from the navigation set forth above. If it will help you in designing your own site layout, go ahead and sketch out a flow chart of your own.
 Let's briefly discuss the first section that will progressively develop in the 'Content Area' called 'Parent.' Every line item in your site outline will have a parent/child relationship with the other line items. See the outline below to fully grasp that concept.
- Home (parent item, no children)
-
About Us (parent item to three children)
- Staff (child to About Us)
- Our History (child to About Us)
- Company News (child to About Us)
-
Products (parent item to seven children)
- Hats (child to Products)
- Gloves (child to Products)
- Scarves (child to Products)
- Shoes (child to Products)
- Rain Gear (child to Products)
- Beach Wear (child to Products)
- Accessories (child to Products)
- Contact Us (parent item, no children)
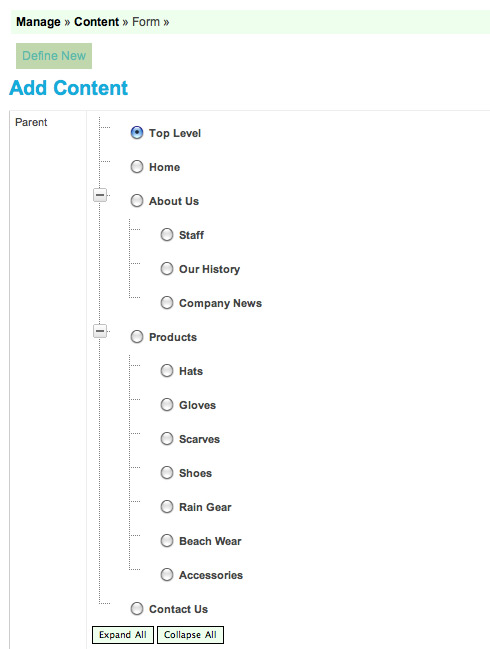
 With that established, let's take a sneak peek at the section called 'Parent' in the final sample site layout. In the 'Define New' screens, we will build this structure.
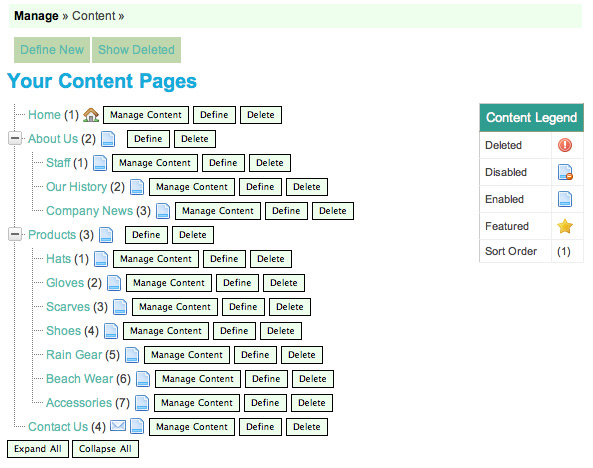
 Below is what the Content management screen will look like when the site is all built. Now that you see it completed, you'll have a better understanding of what's to come.