
Adding new pages
The 'Define New' button > Content Types > Event Calendar
You can find the Content Type by clicking the 'Define New' button for a new page, or the 'Define' button for an existing page.
Many websites have a News & Events type section for their company or organization.The following will explain this Content Type's management. If you are using this content type, then it's content management screen will appear quite different than the General Content Page management screen just did. This is what our sample screen looks like:
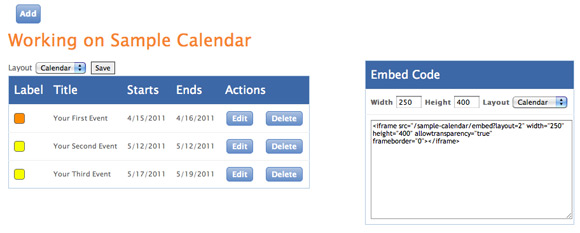
 Click on Add to start adding events to your own calendar.
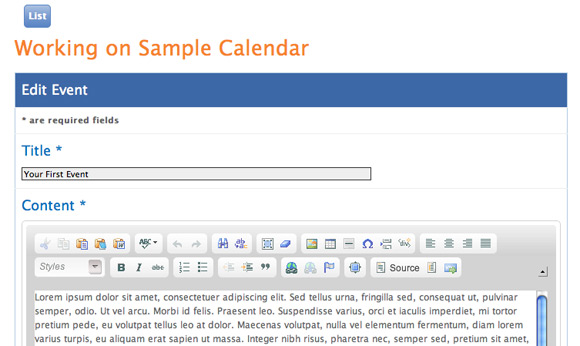
Once again, you are presented with a CK Editor screen to input the title and details of the event you'd like to post.
 All events must have dates. The date(s) input into these fields found below the CK Editor area will be used to keep your events in chronological order on your site. Depending on the design of your site, you may or may not need to also include the dates within the details in the CK Editor above. If your event is at a certain time of day, then you will also need to include that within the event details above.
If your event is a multi-day event then clicking on the multi-day event checkbox will display a second date box to input the ending date.
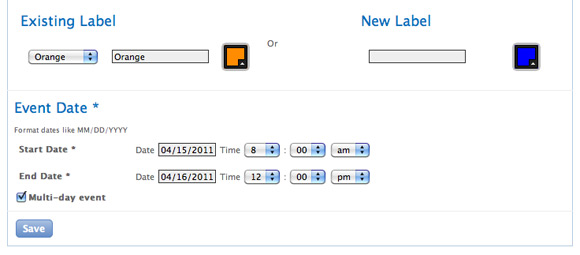
 Your events can be categorized as well, and the categories will be color-coded in your calendar. To add a new category, just input its name into the New Label field shown above, and pick a color to represent it, using the color-picker next to it. Once a category is added, it will remain as an option in the Existing Label drop-down.
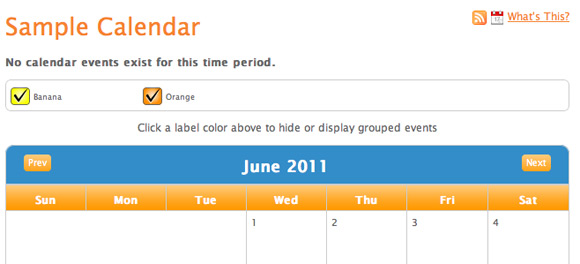
 Did you notice in the image up in #1 that you have two options for how your calendar will display on your site? In the drop-down next to Display (below the Add button), you can choose to display your calendar in an actual calendar layout (see below), or as a chronologic list of events. If you will be listing many events, a calendar layout would be most beneficial. If you will only be displaying a few events then a list should suffice.
 Did you also notice the Embed Code box on the right up in #1? You can copy this block of code into any page, or sidebar (into the source code of the page). This will give you a mini calendar of your events on any page you choose, just like you see in the right side bar of this page!
 Take a look at the Sample Calendar view shown below. Up in the top right corner there are two icons. If you click the first icon it takes you to an RSS feed of the calendar events. Viewers who use RSS Readers can subscribe to your calendar feed in their reader. Clicking on the second icon downloads a subscription to your calendar into the viewer's Outlook Calendar in Windows, or Mac Calendar on a Mac.

![]() As always, make sure you save your edits when you are done. If you leave the screen before saving, you will lose everything you have input.
As always, make sure you save your edits when you are done. If you leave the screen before saving, you will lose everything you have input.
If you are ready to input more events, then click on List at the top of the management screen as shown in the second image above. From there you will be able to start the process over again. The editor is not set up for recurring events. If your event recurs monthly, quarterly, or annually, etc. then it will be necessary for you to enter the event for each occurance with the correct dates of the occurance each time.
The next content type is a Email Form Mailer. Go ahead and click on Email Form Mailer in the top navigation, or on Next on the right to see the sample calendar we just laid out above.
|
|