
Adding new pages
The 'Define New' button > Content Types > Email Form Mailer
You can find the Content Type by clicking the 'Define New' button for a new page, or the 'Define' button for an existing page.
Every website should have some way for its viewers to contact the website owner. The Email Form Mailer is a perfect form creator for just such a contact form. The Email Form Mailer can also be used for surveys, or questionnaires, or any other need to gather information from your clients. For this example, we'll create a contact form. Our sample outline we created does not have a contact form included, but the following instructions will help you lay one out.
If you are using this content type, then its content management screen will appear quite different than any of the screens you've seen so far. The first time you go to to this screen you will see this:
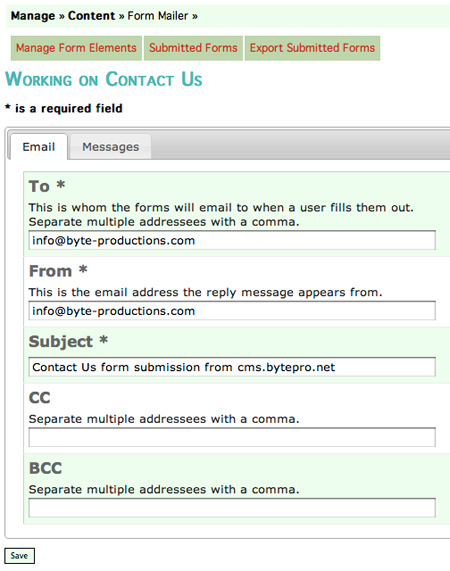
The information you enter here should be viewed as the administrative information related to your form. The email addresses you input will not be displayed on your site. They are just necessary to know where the form's content should be emailed to.
As you can see, we've filled this form out already with example text to give you an idea what should go into each field on your site. Replace any instance of email addresses with appropriate email addresses associated with your site. A Headline and Header Text are optional, depending on what you would like to say above your form on your website. Maybe you just want the Contact Us main header at the top above the form by itself. If that's the case, just skip the Headline and Header text fields.
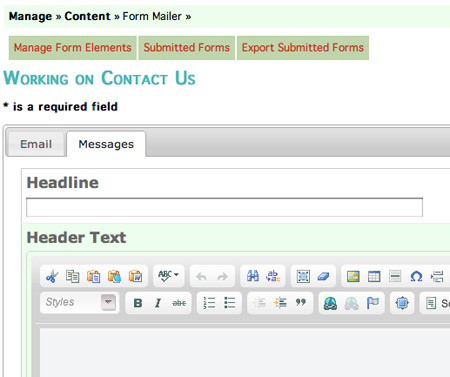
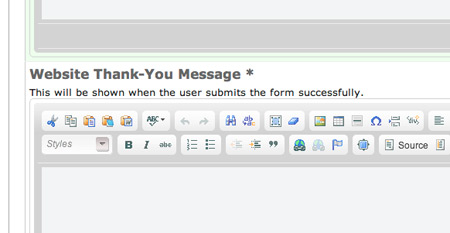
 When your site viewer submits the form on your website, you will get an email with all the information they provided laid out in it. The site viewer will automatically be directed to a thank-you screen at that time. The Thank-You Message field shown below is what you would like that thank-you screen to say.
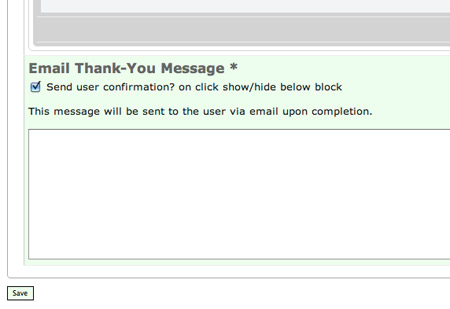
 Below the Thank You Message is an extra optional field. When a site viewer fills out this form you're creating, do you want them to get a confirmation email that the form was received? If so, then just click the 'Send user confirmation?' box to display another CK editor where you can type in your message to be emailed out.

 Now we have completed all of the administrative functions of the form. It is time to lay out the form itself. Click on Manage Form Elements at the top of the screen as displayed in the first image above.

 Since there are no form elements entered yet, you'll see this screen above. Click add to add the first form element.
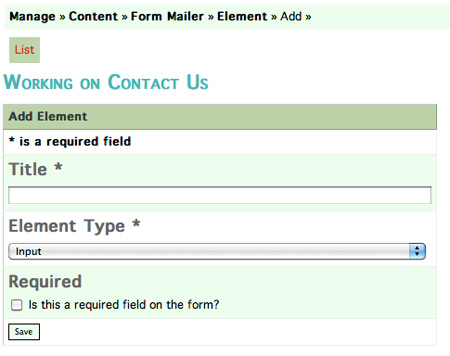
 Since we're creating a contact form, the standard first element is a person's name. Typically you would want to require that they complete this field so you know who submitted the form. Check the Required box to do that. The form will not be able to be submitted by the viewer unless they at least have this field filled out. You can require any of the fields on the form. It's not recommended that you require all of them though. Many site viewers are only willing to give up their name and email address initially. If you require too many fields, they may just go away instead of submitting their inquiry.
The only field that the site requires is gathered is the email address. Without the email address, the form will not be able to send an emailed confirmation of its submission to the form submitter. Because an email address must be gathered, we have automatically put that required field into all forms. You DO NOT have to add a field for an email address, as it will already be there. Your company may require a phone number, an account number, etc. though. As you enter the different fields, you will need to select an Element Type from the drop-down menu. This is a required entry. Here are brief explanations of what each option means:
- Input: An Input field is the standard text box like the Title box shown above.
- Text Area: A text area is a larger input field used for comment boxes, etc. An example of a Text Area would be the Response Message box shown above.
- Radio: No, this does not refer to anything audio. Radio buttons are the little round buttons you see on sites for selecting items. Only one item can be selected in a list using radio buttons.
- Select: Select creates a drop-down list such as the one used for the Element Types we are referring to.
- Check List: A Check List is exactly as it sounds. It creates a similar layout as the radio buttons, but instead of round buttons it displays check boxes. Multiple items can be selected from a list using check boxes.
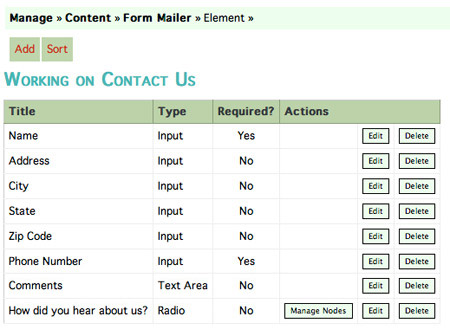
 Above is an example of a contact form we created on our sample site. In reference to the sample site, we decided to gather a list using radio buttons of what products from our sample site the site viewer might be interested in.
Below is a view of what we see in our sample site when we click on Manage Nodes in the 'How did you hear about us?' line shown above.

 In the example above the Title is what will be seen next to the radio button in the list on your form. The Value is what will display in the email you get from the form submission as the Interest that they selected. Only one item in the list should be checked as the Default value.
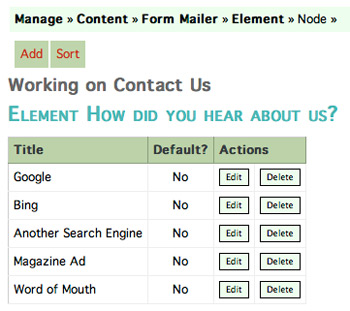
 Above is our completed list of Interests our sample site viewers could select from.
As always, make sure you save your edits before you leave the screen. View your site to see the form you've created. If you've entered your own email address as the recipient, fill out your form to test it. Try submitting it without filling in the required fields. Finally, submit the form and watch what happens. You should receive the form submission email right away. If you used your own email address when you filled out the form, you should also get a confirmation email from your site. You will also see the thank you screen that appears once the form is submitted. If anything you see doesn't look quite right to you, then go back and edit the form until you are satisfied.
Exporting Submitted Forms
You can click on the 'Submitted Forms' button to see all the submitted forms right online, but if you would like to download and save those form submissions, you can save them into an Excel spreadsheet by clicking the 'Export Submitted Forms' button instead. Learn more about how to do this by clicking to the next page...
|
|